
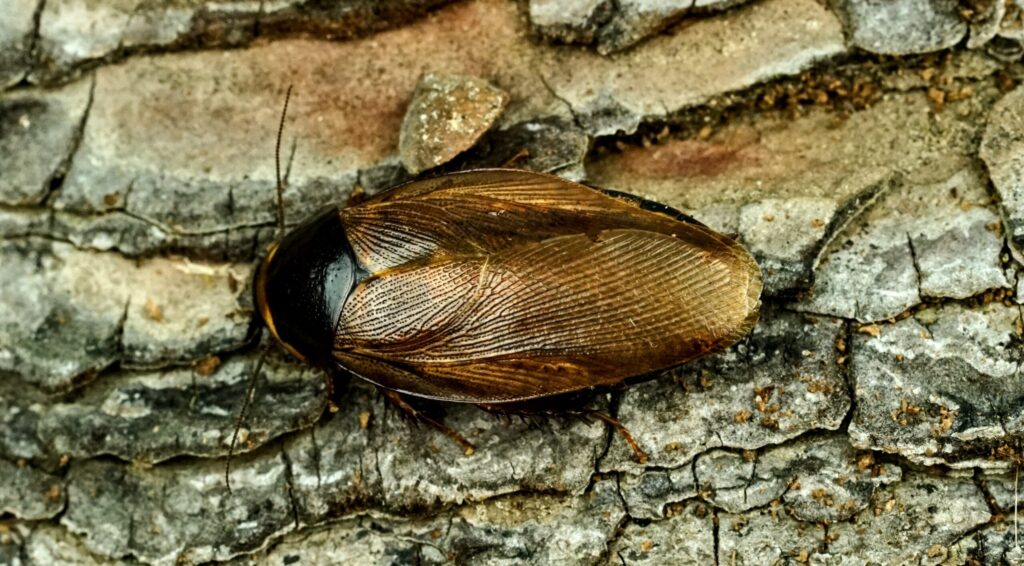
It is a medium-small sized cockroach native to India and Malaysia, but today it can be found as an alien species in many tropical and subtropical regions, having arrived via transport of objects and plants, and in some specific temperate locations with a microclimate that allows its survival and reproduction. It has a purely fossorial lifestyle, thanks to its robust legs, in fact, they can dig quickly, thus managing to burrow in case of danger. Thanks to the presence of adhesive pads, located at the level of the tarsi, they can climb smooth walls of plastic, glass and metal. Adults have two pairs of wings, the first, more sclerotized and light brown in color, is called “tegmina” (visible in the photo above). When kept in a resting position, together with the second pair of wings, they completely or partially cover the female’s abdomen (during pregnancy the latter tends to dilate due to the presence of the ootheca in the reproductive system, protruding from the rear edge of the wings).
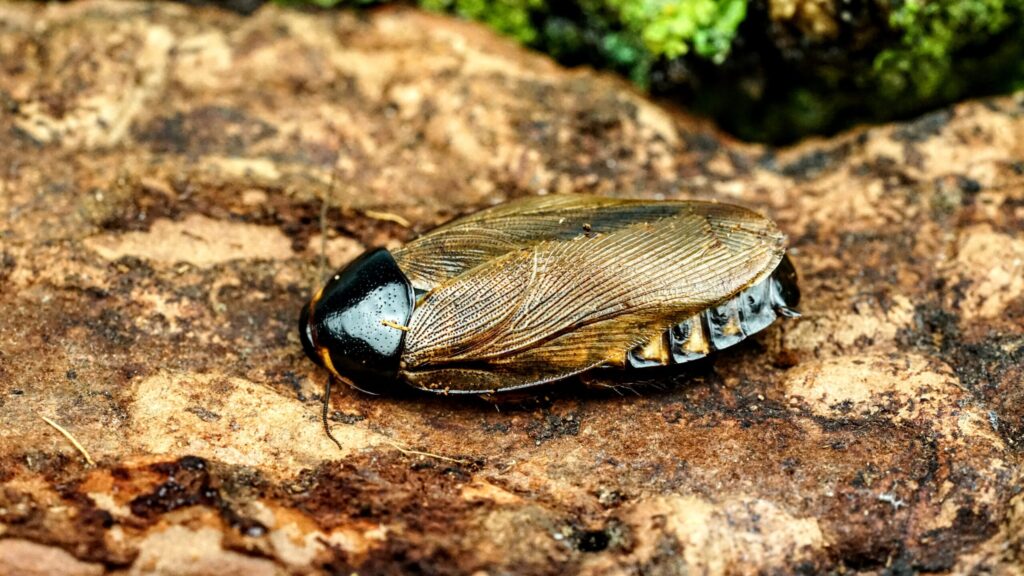
The second pair of wings is fully functional, less rigid and suitable for flapping flight (flapping flight is a type of flight supported by the active flapping of the wings, this allows the specimen in question to rise from the ground without third party aids, unlike gliding flight). Given their lifestyle it will be very rare to observe them in this demonstration, but in conditions of high temperatures, overcrowding or lack of nearby supports it will be possible to witness a beautiful panoramic tour of the room. If not particularly heavy and with the right temperatures, females can fly even for several meters, even being able to change direction during flight. Note that this action will still be very slow, making them predictable and easily catchable.
How to build the box
For breeding you will need a box of variable dimensions, depending on the number of individuals present in the colony, with a hermetically sealed lid. To start I recommend a small box, a 5.8l cubic braplast will be fine, to which you will need to modify the lid to allow the animals to breathe.
To ensure proper ventilation, there are two ways to do so:
- Use a pin to poke holes all over the lid to create a “mesh” effect.
- Cut a square of plastic off the lid to leave a large open “window,” over which you will need to attach a fine mesh wire mesh.
In the first method, which I personally do not recommend for the reasons given below, you will need to use a heated pin or the tip of a soldering iron to make the holes. For the second you will need a pair of sturdy scissors to make the cut and some fine mesh wire mesh + glue to adhere it to the plastic.
Let’s now see the advantages and disadvantages of both methods:
- Method 1:
- Advantages: it does not require any special materials to make it, all you need is a pin and a heat source that we all have at home (whether it’s a lighter or a domestic stove)
- Disadvantages: long time required to make a sufficient number of holes to ensure adequate ventilation and difficulty in making holes large enough and close enough together to allow enough air to pass through but at the same time small enough to prevent the L1 (first stage) nymphs from coming out.
- Method 2:
- Advantages: greater and uniform ventilation and low execution time
- Disadvantages: more material needed and possibility of breaking/cracking the plastic of the lid if you are not skilled enough
Still talking about the second method, we now explain how to make the mesh-plastic joint leak-proof.
First you need to make the central cut. For this we can use:
- Welder, with which we will melt the plastic along the designated perimeter until the central portion is detached, a simple method that avoids accidental breakages
- Scissors, preferably electrician’s scissors or sturdy scissors, which allow you to achieve the same result without having the classic “edge” of melted plastic that would complicate gluing the mesh.
After that, it will be necessary to glue the mesh using glue, either Bostik or hot glue will work, or using a soldering iron, melting part of the surrounding plastic to incorporate the metal mesh, making the bonding definitive.
A piece of advice I would give, given the ability of P. surinamensis to break smooth glass and plastic walls, is to place a layer of non-woven fabric between the lid and the container. This allows both to improve the airtightness of the container itself, and to avoid any escapes of small nymphs from particularly large mesh of the net.
Avoid using only non-woven fabric, their jaws will not struggle to gnaw it until it is completely pierced. Better to use these fabrics as an additional precaution and add them to the wire mesh.
Interior design
Since the fossorial attitude is present in both adults and young animals, it will be necessary to insert 5 to 15 cm, depending on the size of the colony, of substrate made of peat or coconut fibre.
PS peat is slightly more acidic, so it helps limit the development of mold and parasites.
Another important ingredient to use are dry leaves, preferably oak leaves (thanks to their high tannin content they further limit the proliferation of mold and pathogens). They are also essential because they represent an important food source for cockroaches themselves and, placed on the surface, will contribute to maintaining a good level of humidity in the soil, allowing us to thin out watering.
Particular attention must be paid here:
Pycnoscelus surinamensis are extremely resistant cockroaches, they can live for days without food, water and without substrate, but without the right humidity gradient reproduction will cease and the specimens may begin to die (the process can be rapid or more gradual).
So how do you know if the humidity is right?
The best thing is to get used to it. Unfortunately, inserting a hygrometer into the soil is not feasible, especially with large colonies, so it will be necessary to prepare the box a few days before inserting the cockroaches, create the humidity conditions that seem adequate and do two tests:
- Check that there is no “dust”. This is useful to avoid leaving the coconut fiber too dry. If there is no dust, it means that the small particles have joined together thanks to the bonds maintained with the water molecules
- Take a handful of substrate and squeeze it in your hand. If this, once you squeeze it, is compacted like field soil, wet or even makes water come out, we can conclude that we have exaggerated with the humidity and it will be necessary to let everything rest so that the soil dries out.
If you are in doubt, it is better to wet less, adding water takes little time, removing it requires much more time and effort than… you get the idea.
When the colony is just starting out you will need to water the soil much more often to keep it adequately moist, as the numbers increase, however, the opposite problem will arise. Given the large number of specimens in a relatively small volume, it will be necessary to administer a large amount of wet food, which we will talk about shortly. The same water contained within them will literally wet the coconut fiber without requiring our intervention, in these contexts good ventilation will be essential to evaporate excess humidity and not leave the soil soaked.
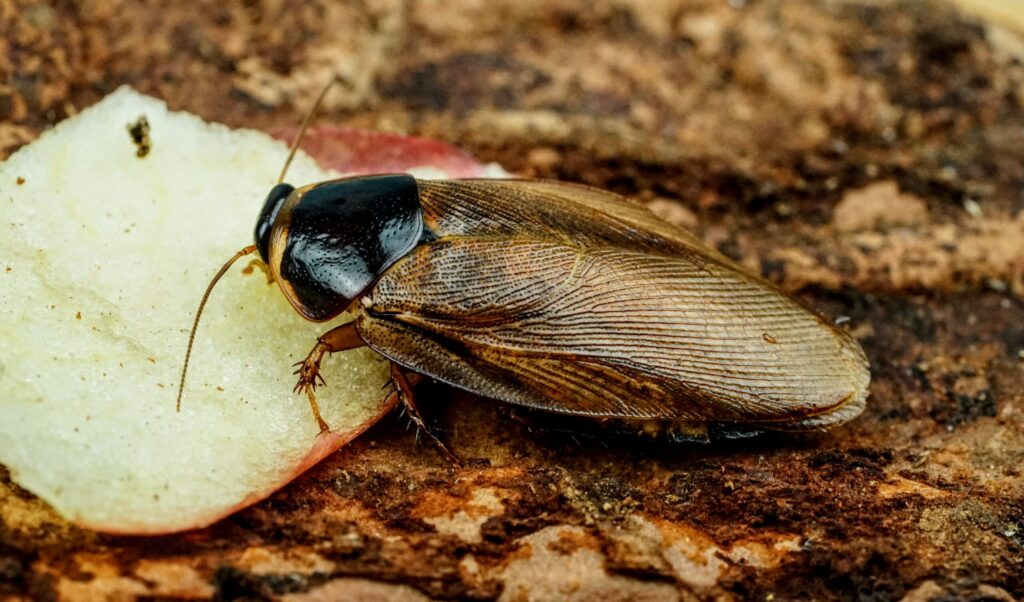
Diet
As for food, you can literally use whatever you want, they are easy-going and will eat anything.
To give a mental scheme you can divide food into dry and wet:
- Dry food, can be represented by kibble (for dogs or cats), dry bread, fish food, carp sticks, rabbit sticks etc.
- Wet food, fruit and vegetables as desired (avoid giving nightshade plants such as potatoes, tomatoes and aubergines and do not give fennel either)
The feeding schedule will vary greatly depending on the temperatures and the number of specimens. In winter I feed once a week giving relatively little importance to the protein intake, in summer I increase to twice a week and increase the amount of protein, so as to help the females in gestation.
You will need to be very careful not to overdo the amount of food. Being fossorial, they will tend to take what you put on the surface of the substrate and drag it down to consume it in peace. Especially at the beginning, you must not be fooled. If the kibble disappears DO NOT ADD MORE BEFORE THE NEXT MEAL. These could, in fact, still be present in the soil and, over time, could lead to the proliferation of mold and mites. So if you are in doubt about the amount of food to provide, it is preferable to be a little less. If you put less, you can always add more the following day, if you put too much it becomes difficult to recover it.
Temperature
Depending on needs and impatience, the colony can be heated or left at room temperature all year round, between 18 and 30 degrees.
I prefer to make almost all my colonies feel the seasonal cycle, maintaining a temperature of 18-20 degrees in winter and 26/30 degrees in summer (obviously with circadian cycles).
This will lead to a “setting” of the specimens that will find themselves becoming adults en masse at the beginning of spring, reproducing throughout the summer and starting to die in autumn (the adults), to then spend the winter with a low number of reproductions and thousands of growing nymphs.
If you need to have an extremely reproductive colony, you can heat one side of the box, using a mat or heating cable, and keep them exactly as you would during the summer, with more constant watering and feeding. NEVER put the mat/cable under the box, this causes excessive evaporation of the water with drying of the affected area.
With Pycnoscelus surinamensis I think I’ve said it all, if there are any further doubts or inaccuracies write in private or in the comments below, it always gets better!
That said, as always, I wish everyone good breeding!
Card edited by
Lorenzo Pelicella